Grand Archway - part I
Published 5 Oct 2025
The finished first side
my most involved terrain project to date…
I like to keep bits of packaging1 that I think have potential as useful crafting materials. One such hoarded item was a squat oblong box, with a square footprint. Not that uncommon but unusual enough for me to hang onto it. The idea initially came from my partner; to build an open four-sided structure with an archway on each face - I liked it as a concept for a piece of terrain because it can allow line of sight through, and can have minis placed both underneath and on top.
I decided to make two different arch designs for the piece to introduce some variety - one design would be shared by the opposing faces.
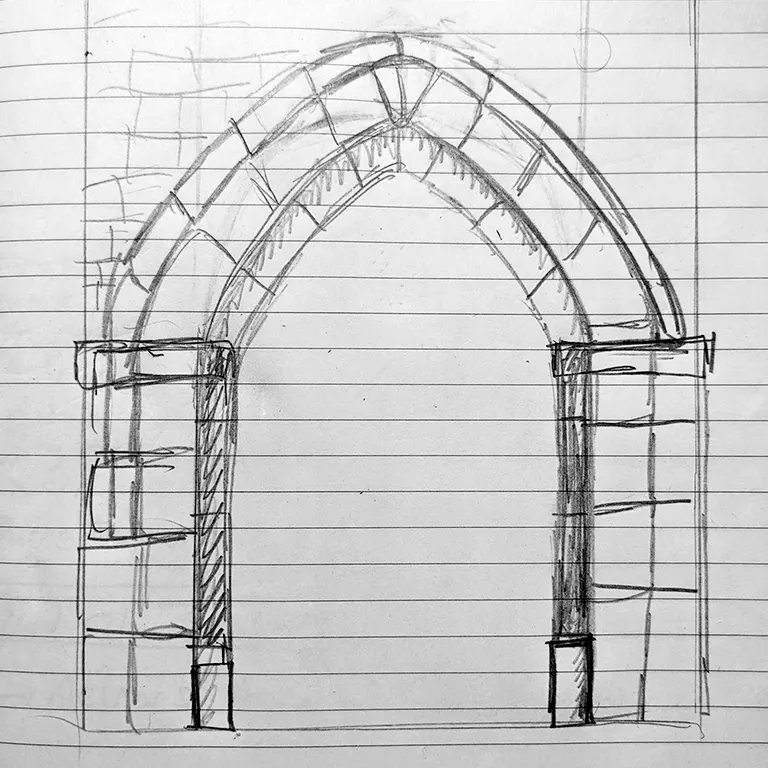
Plan
Arches rock - I have been collecting photos of different gothic archways in the wild, mostly on churches. Something I had never noticed prior to this was how important ‘layering’ the trim around the archways is to the aesthetic.
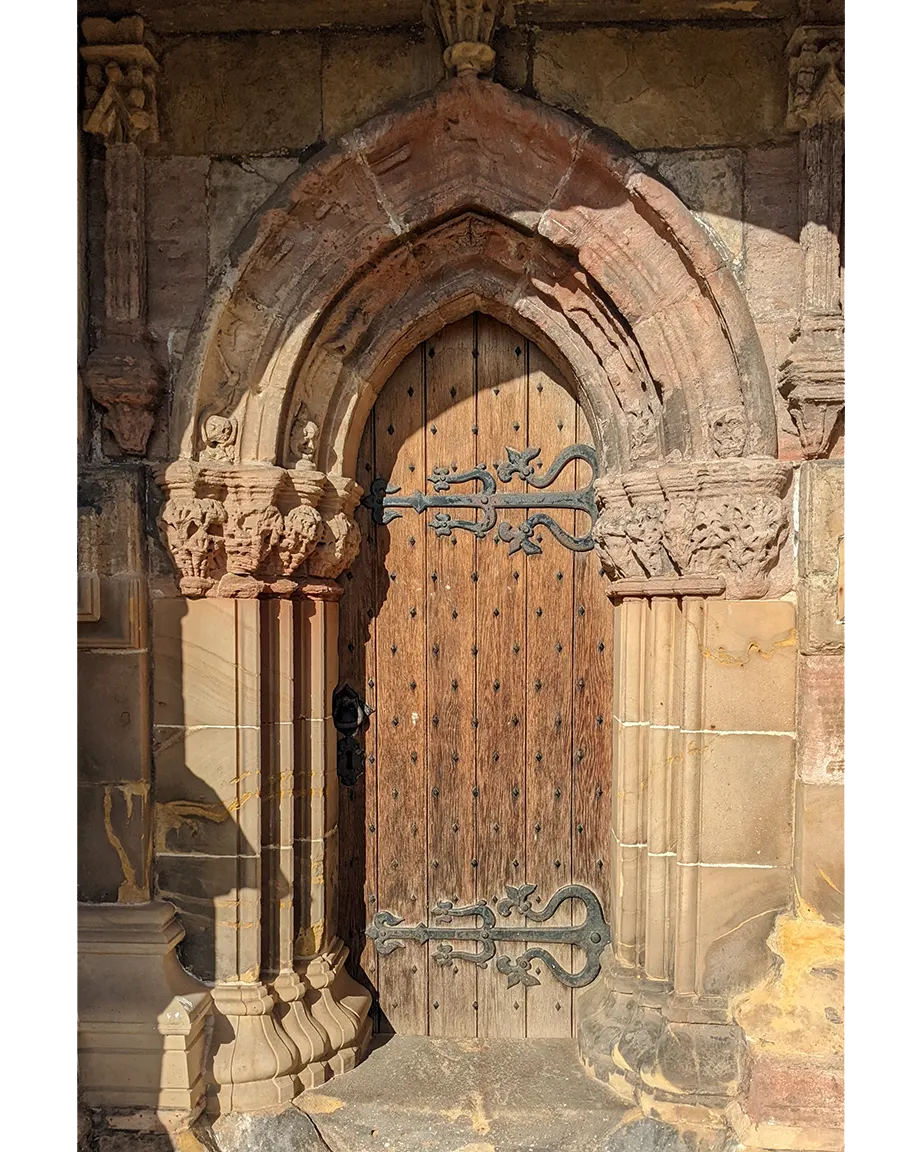
Some of the layering seen can be incredibly over the top and it really works! However, I wanted to give myself the grand look without going overboard so I settled for 3 layers, going for simpler, square pillars for the corners. One day we might ge into some more elaborate carvings but it’s good to set realistic goals.
That’s about it as far as planning goes. I had so much fun on this project just following my nose, trying out different approaches. I think one learns a lot this way, and I find it builds momentum. Maintaining motivation is a big part of completing these more ambitious projects. Onto the build!
Build
I started by cutting the first arch shape out of another piece of card and tracing it on the box itself. Then on the main box I sliced off the bottom before cutting arches out of the first two opposing sides.
Premium
Remembering that layers are everything, I cut out a smaller archway from a flat piece of card and glued this inside the main box - adding some variety and depth to the surface before we even begin to put foam on the piece. I could have just made the foam thinner in these places but I think it also helped as a guideline for the ‘exploratory’ process that I was undertaking.
Layered card adds some depth
Bricks
The pillar facades were roughly measured and cut as a single strip from 1” insulation foam. The brick outlines are marked and scored several times with a biro, softening the edges with the rounded tip. Then a balled up piece of tinfoil is used to texture them. So easy! All brickage in this project is done in basically the same way.
As I worked to the rough design, I was also taking liberties with what felt good - for example after making an inaccurate block for the left, I simply made the right one match instead of making the left one perfect. Favouring momentum over perfection!
Little details make all the difference
While the shapes I was adding were simple, enough variety helps to sell the look that this could be a real stone structure. Using two kinds of foam helped too: the pink stuff is from a 1” slab of XPS insulation foam while the white bits are from a less dense, ‘dollar store’ 1/4” hobby foam sheet.
Measuring once, cutting twice..
I was enjoying working with the thinner, white foam for detailing, because it was much easier to cut with a knife than the pink stuff. But my Gung-ho approach did result in a lot of cutting things after glueing them, trying to be roughly symmetrical.
The first keystone was a little tricky, taking a few attempts to get it fitting and looking right - but in the end it turned out okay. I think the vibe can be described as ‘whimsical fantasy’.
I decided to make the next arch slightly thicker to add to the ‘layering’, switching back to the pink foam. I tried to keep these bricks symmetrical but there’s only so much one can do with just a knife - a hot wire-cutter would be a lot more consistent.
The piece really took shape after applying the next layer. I cut strips from the thinner foam, slightly wider than the pink foam blocks - and wrapped them around the outside. I got carried away and added a second pair of strips, even wider, technically creating a fourth layer!
This step was pretty tricky to do as angles needed to be correctly cut to ensure a proper fit at either end. This did result in me applying too much glue while holding ends together and slightly melting the foam in the proecss.
The last step for the first side was to trace the current arch onto the hobby foam and cut out a facade for the rest of the brickage. Using a ruler for the horizontal scoring and totally freeballing it for the vertical brick lines..
Like I said. ‘Whimsical fantasty’
Second side - Lessons Learned
I was pretty pleased with side one, but there were a few things I learned along the way that would help make the second side more straightforward.
- Scoring a group of pillar facades together was a 300% increase in efficiency!
- Cutting the base pieces as single blocks saved me from having to line up the individual bricks.
- Adding the keystone first meant I could start with the shape I actually wanted.
- Slightly cutting all the way through one side of the scored bricks meant I could bend a straight piece, fitting the curved arch better.
I was using offcuts for the second layer bricks, so I had to slice a few down after glueing them on. But it resulted in a nice comparison of the texturing effect.

- Cutting and glueing both the outer strips together before attaching them made a world of difference to lining things up - and gave a much cleaner result.
And with that the second side ended up going on a lot more easily than the first. I can’t say the symmetry was all there but I was (and still am) so pleased with the final result.
Nonetheless the effort undertaken to get this far was significant, and I decided to rest on my laurels for a bit. I had this half done piece sat by my desk for a few weeks just looking at me while I built up the courage to work on the next two sides.