Grand Archway - part II
Published 13 Oct 2025
The finished second side
The first side was looking awesome at this point and I was really looking forward to getting that pink and white foam painted! Because it took so long to do I decided to shift tac on the second arch design and go for something simpler.
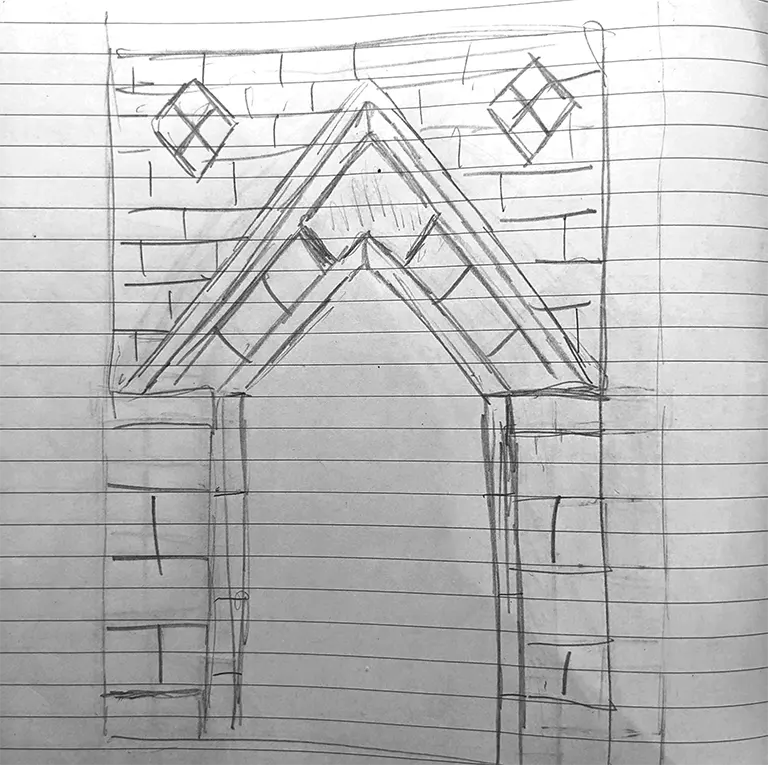
This is the first drawing I did - it still felt elegant1 and gothic, whilst the lack of curves would help a lot with building. Armed with the lessons learned from crafintg the first design (twice!) I felt confident this one would come together a lot faster.
I had already glued on the two pillars that surround each arch when I did the first two sides. The advantage of this was that I didn’t have to measure these bits - I just cut the arch to the width between them!
Instead of the inset I created on the first arch design, by glueing a strip of card with a smaller arch of the same shape inside, the second design was flush to the surface of the pillars. I added interest with thin, flat strips of foam glued on the inside of the pullars and scored it to make it look like brick panels. This design was continued on the inside of the archway itself.
The pink, thicker foam bricks were a lot easier to get sized up for the two sides of the arch as there were no curves! Then I glued on another pair of white foam strips on the upper side of the pink arch bricks. It was already looking great, but remembering the key rule for making realistic arches - Layers - I slapped on a second piece of white foam. By making i slightly thicker than the first one it instantly added that depth I was looking for. Although there were less levels of depth overall on this design, it still had enough visual interest in my eyes.
Then it was a simple job of cutting a piece to cover the remaining card and marking up the rest of the bricks to make it look cohesive with the existing sides. I didn’t end up implementing the diamond shapes that I drew in the initial design because I had already had some ideas about the roof - I didn’t think there would be enough space for them to look good in the end.
The 'facade'. The edge where the two foam pieces meet would need covering.
`Now I was really starting to get buzzed - this was by far the coolest piece of terrain2 I’d ever put together - And I wasn’t even finished. Because the outside was looking great, it felt right to cover the disgusting exposed cardboad on the inside. I cut some pink pillars to go in the corners and took a few attempts to get the interior facades cut just right, so the gaps were minimal - although I wasn’t holding myself to too high of a standard here.
Obviously I would measure the pieces out and score the bricks before glueing it in place. The extra effort to do the inside really paid off and the piece hard started to feel great to hold and look at - although it was a little wobbly on the table.
Hmmm.. we can do better than that.
To stabilise the bottom I then cut and glued squares of cardstock on the feet and underside of the roof. I had thought to try some intricate dome shape with bricks - but I’m not that crazy… yet.
However I was crazy enough to realise that even though no one would ever see the underside, I wasn’t happy with just plain cardstock there. So I glued lollipop sticks onto the surface, scored where planks might line up on a wood floor and cut the corner shapes.
After inserting and glueing this floor/ceiling bit in I was really starting to feel accomplished! The piece was really getting some weight and heft to it which made it feel more substantial. Despite being an amalgamation of insulation foam, hot glue and cardboard it was almost.. art?
Really coming together at this point!
I decided this was a good place to leave it for this ‘episode’. Part III covers the roof and “edge bits”.